Event keys
Methods for creating notes (Event key)
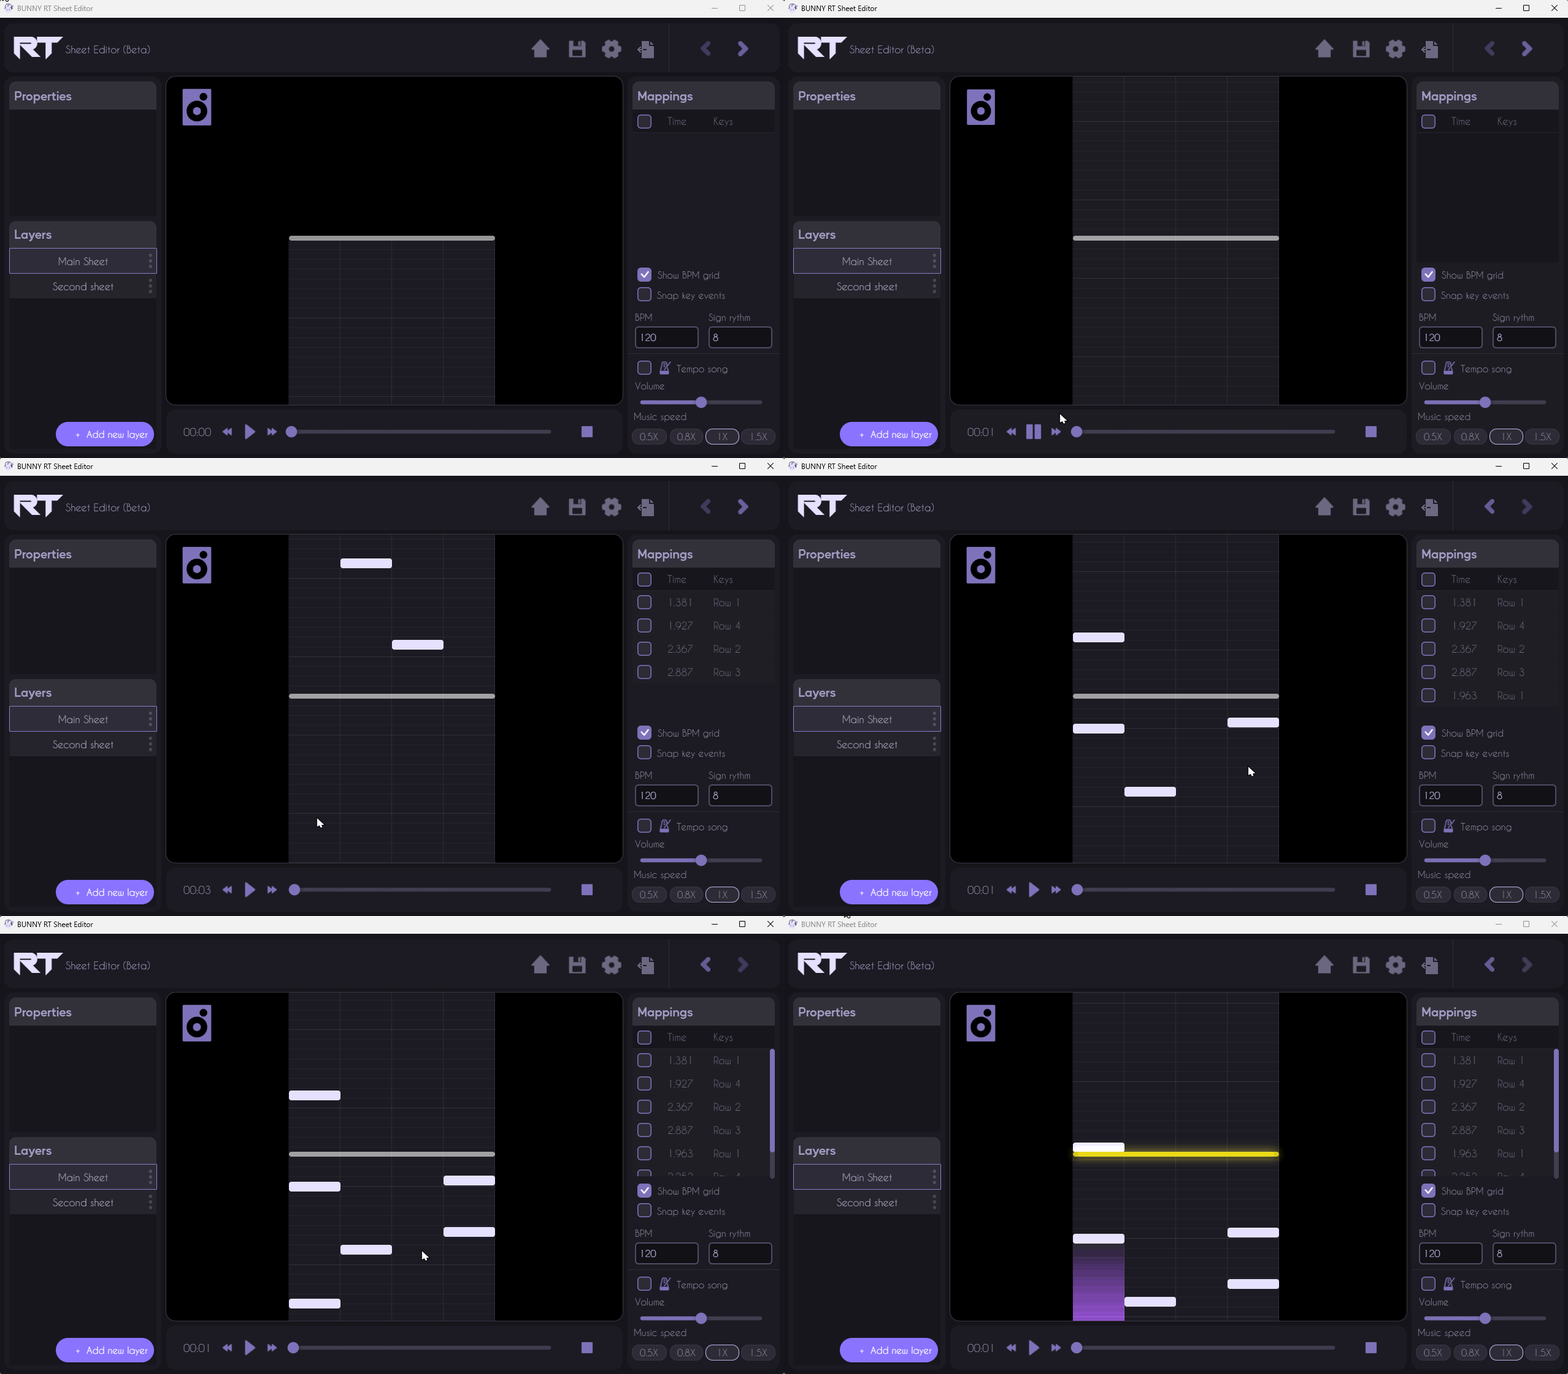
Creating notes while music is playing :
- Using event buttons : When music is playing, you can create notes by pressing the buttons defined for each row. These buttons are configured in your keyboard settings and enable you to create notes in real time to the beat of the music.
Creating notes when music is paused or stopped :
- Moving the cursor: When the music is paused or stopped, you can create notes by moving the cursor on the rhythm sheet to the place where you want to add the note. Then right-click there and select “Create note” from the context menu.
Change creation buttons
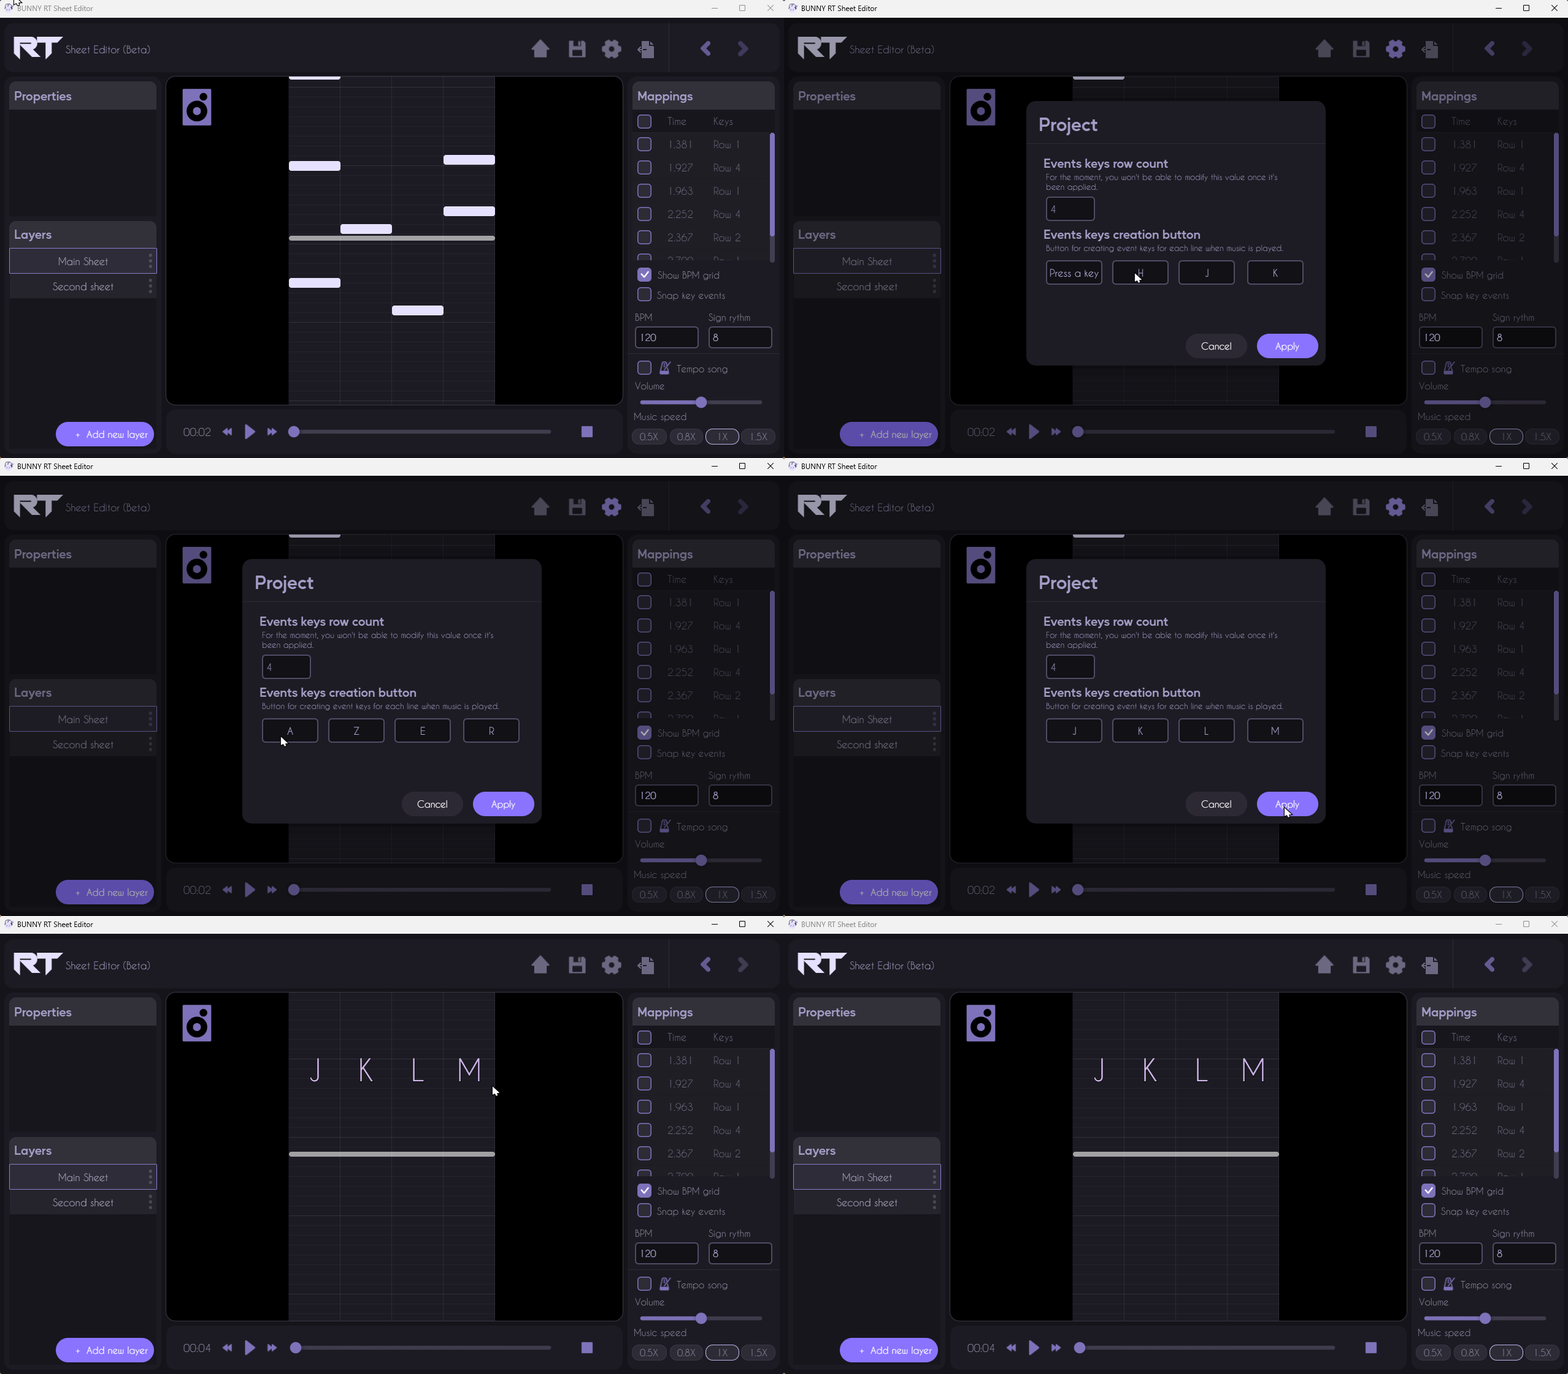
To customize the note-creation keys (event keys) when music is playing, follow the steps below. This will allow you to adjust the keys assigned to each row according to your preferences.
Accessing project parameters :
- Step 1: Locate and click on the Settings icon in the Rhythm Editor interface. This icon is often represented by a gear or cogwheel, and is usually located in the top menu bar.
Navigate to event key parameters :
- Step 2: In the project settings menu, look for the section dedicated to event keys or keyboard configuration. This is where you can modify the buttons assigned for note creation.
Modify note creation buttons for each row :
- Step 3: In the event keys section, you'll see a list of available rows (for example, Row 1, Row 2, Row 3, Row 4).
- Step 4: For each row, there will be a field where you can enter or select the keyboard key you wish to assign. Click in the field corresponding to the row you wish to modify and press the new key you wish to assign.
- Step 5: Repeat this operation for each row until all keys are configured according to your preferences.
Save changes :
- Step 6: Once you've modified the note creation keys for each row, be sure to save your changes. There may be an “Apply” button
Selecting a note
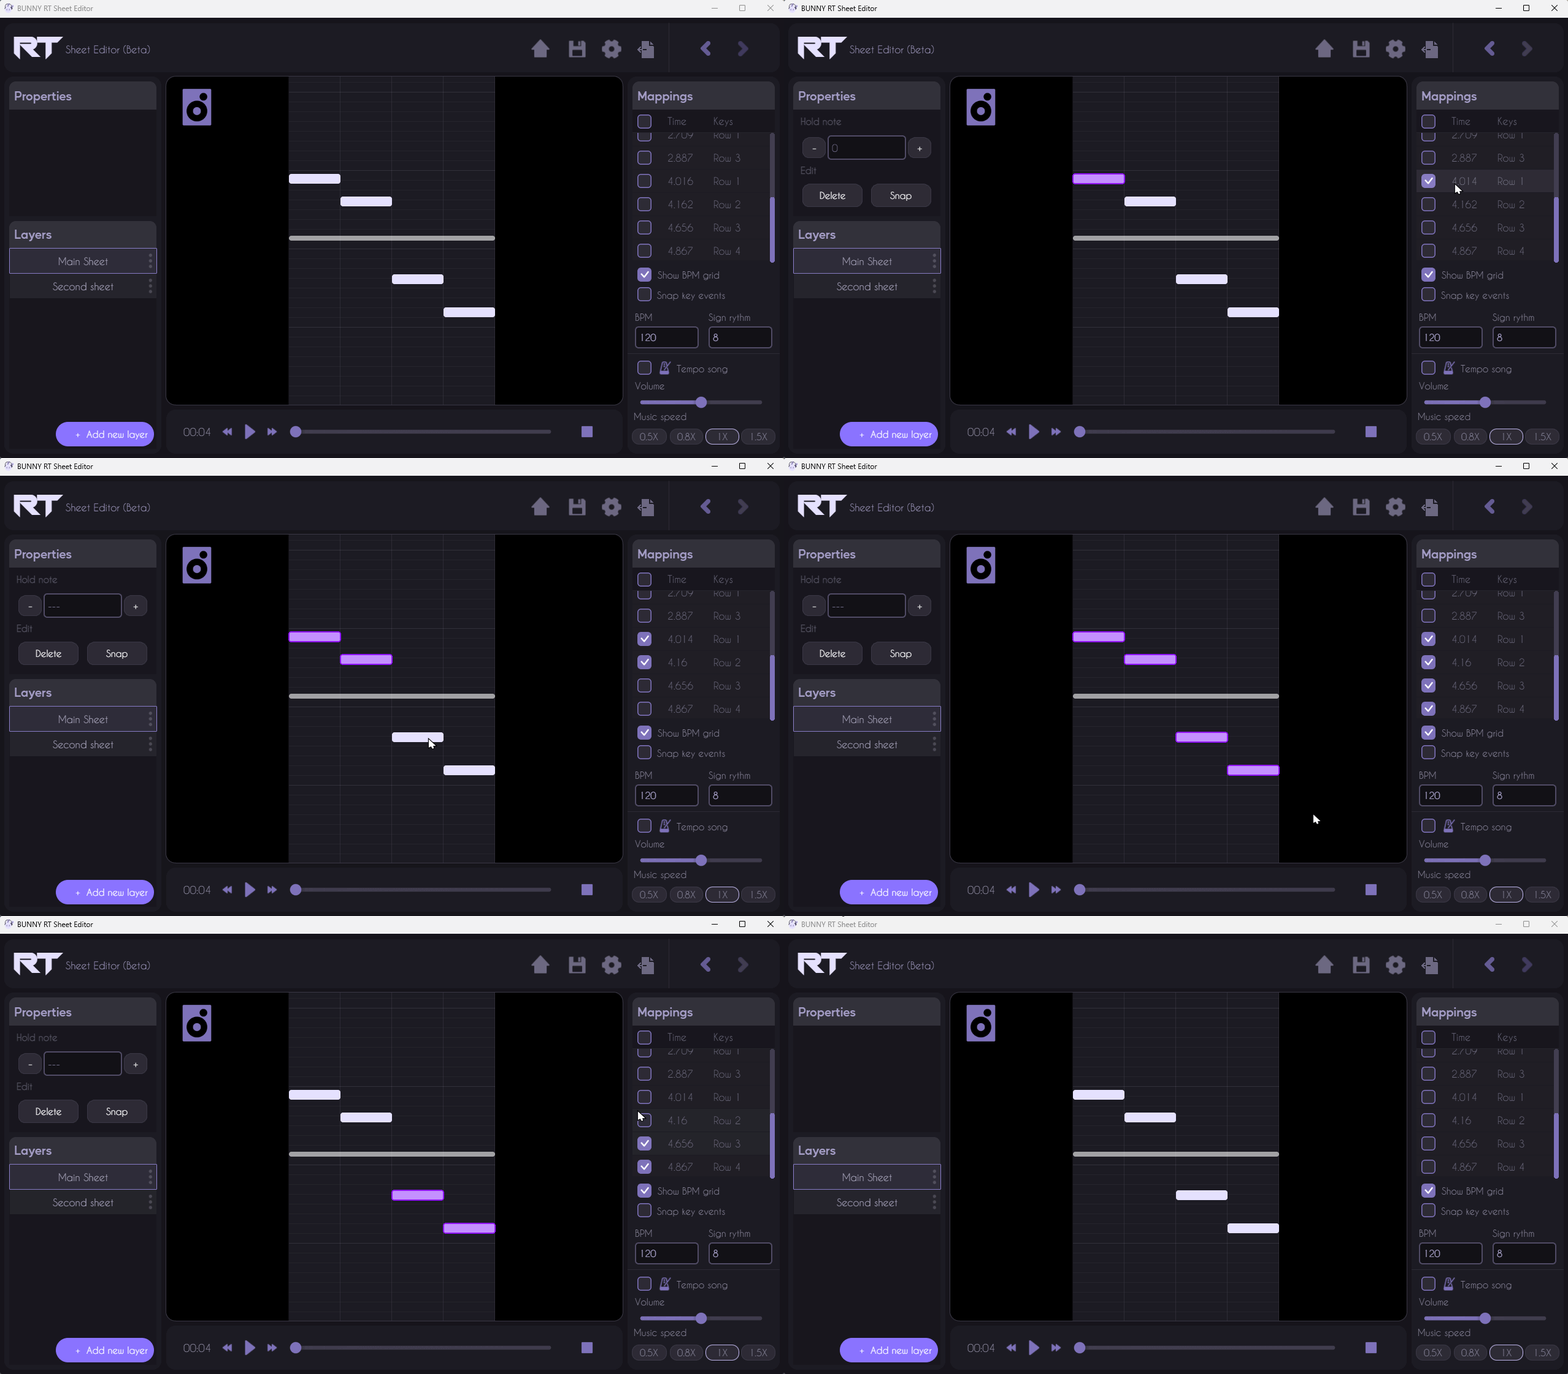
Note selection is an essential step in manipulating and editing musical events in the Rhythm Editor. Here are the different methods for selecting one or more notes:
Selecting a single note :
Simple method: Click directly on the note you wish to select. This will highlight the note, allowing you to edit or move it.
Select several notes:
- Group selection: To select several notes at once, use the shortcut
Shift + right-click.Click on individual notes while holding down the Shift key. This will add each clicked note to your selection. - Lasso selection: Click and hold the left mouse button, then drag to draw a rectangle around the notes you wish to select. Release the button to select all notes included in the rectangle.
- Using checkboxes: In the mapping panel on the right, each note is represented by an entry with a checkbox. Click on the corresponding checkboxes to select multiple notes.
Select all notes:
- Keyboard shortcut: Use
Control + Ato select all notes on the rhythm sheet. - Global checkbox: Click the checkbox at the top of the mapping panel to select all the notes listed.
Move on sheet
Drag and drop:
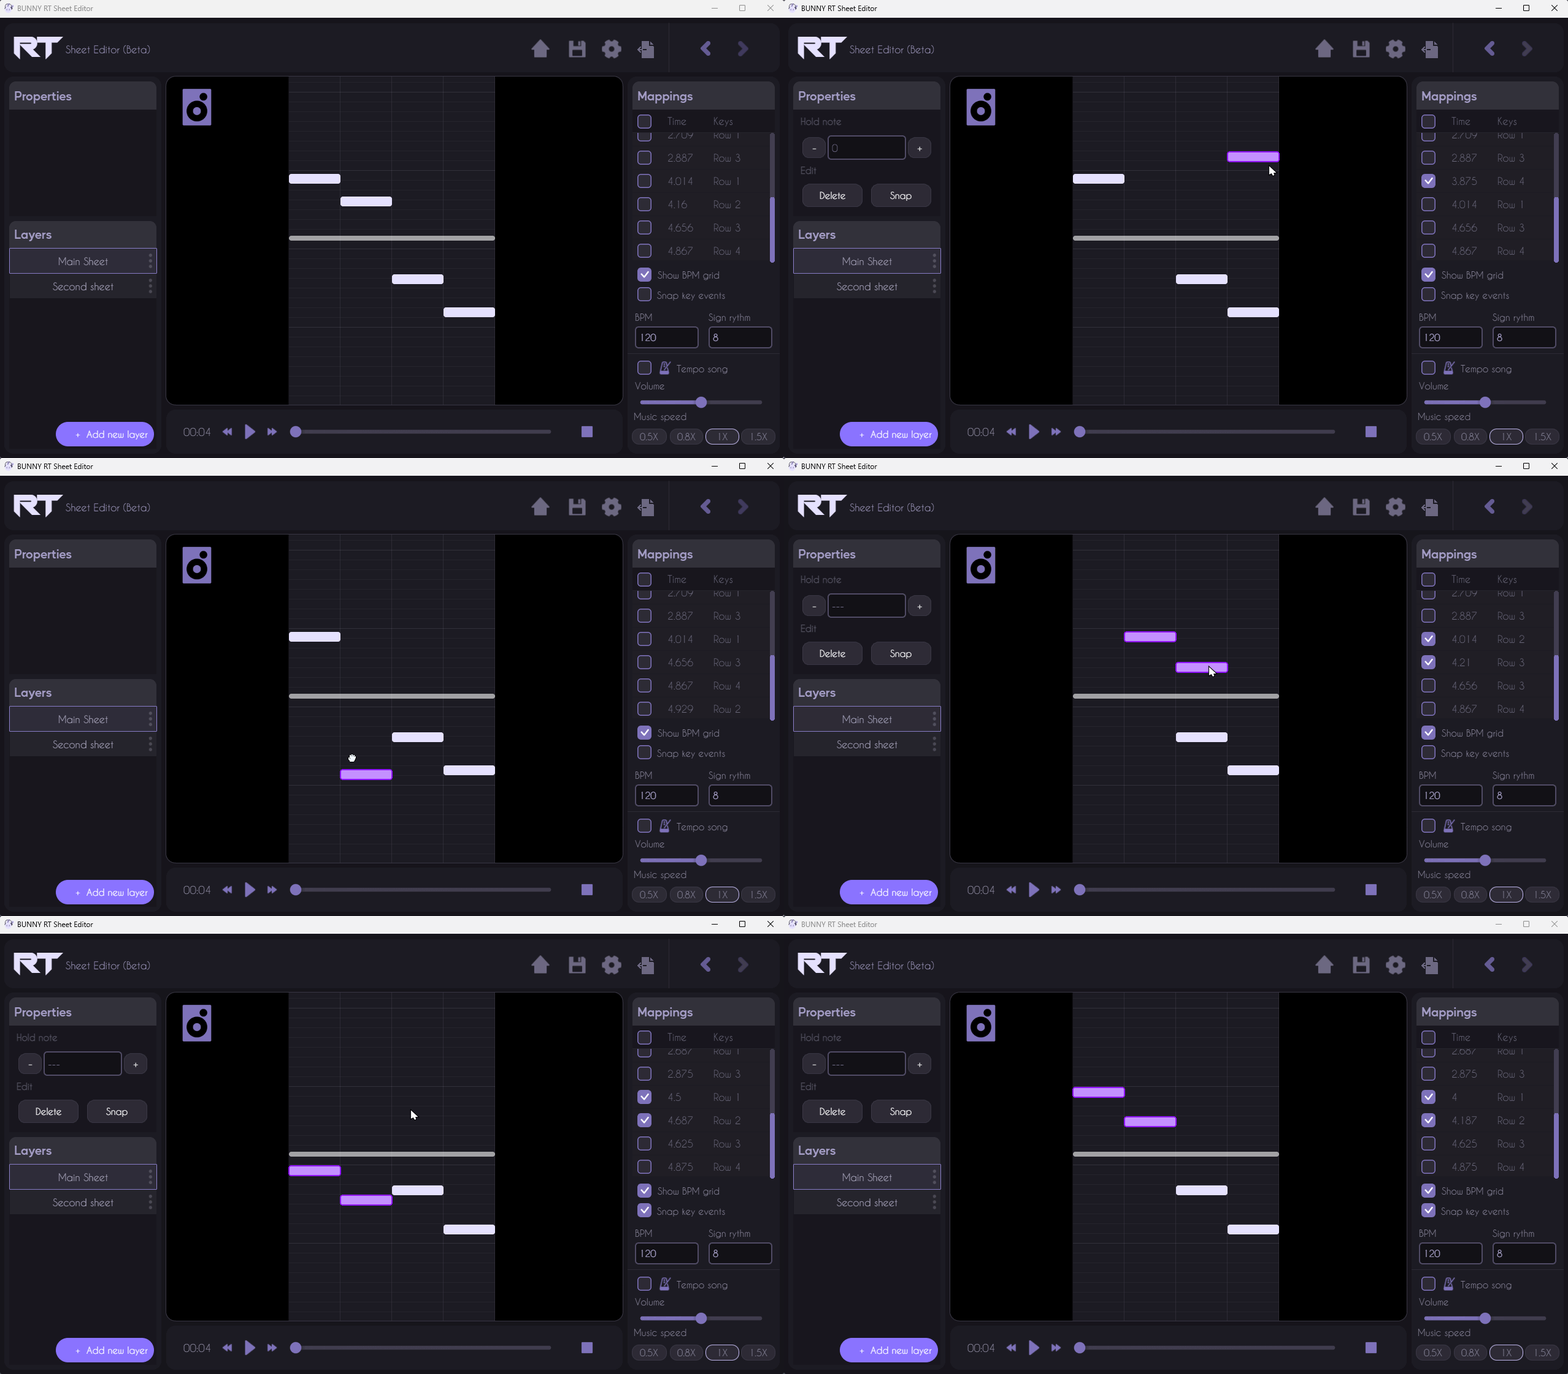
Move a single note: Click on the selected note, hold down the left mouse button and drag the note to the desired location on the sheet.
Use keyboard arrows :
After selecting notes, you can move them using the keyboard arrow keys. This allows you to move them precisely one unit at a time, ideal for fine-tuning.
Duration
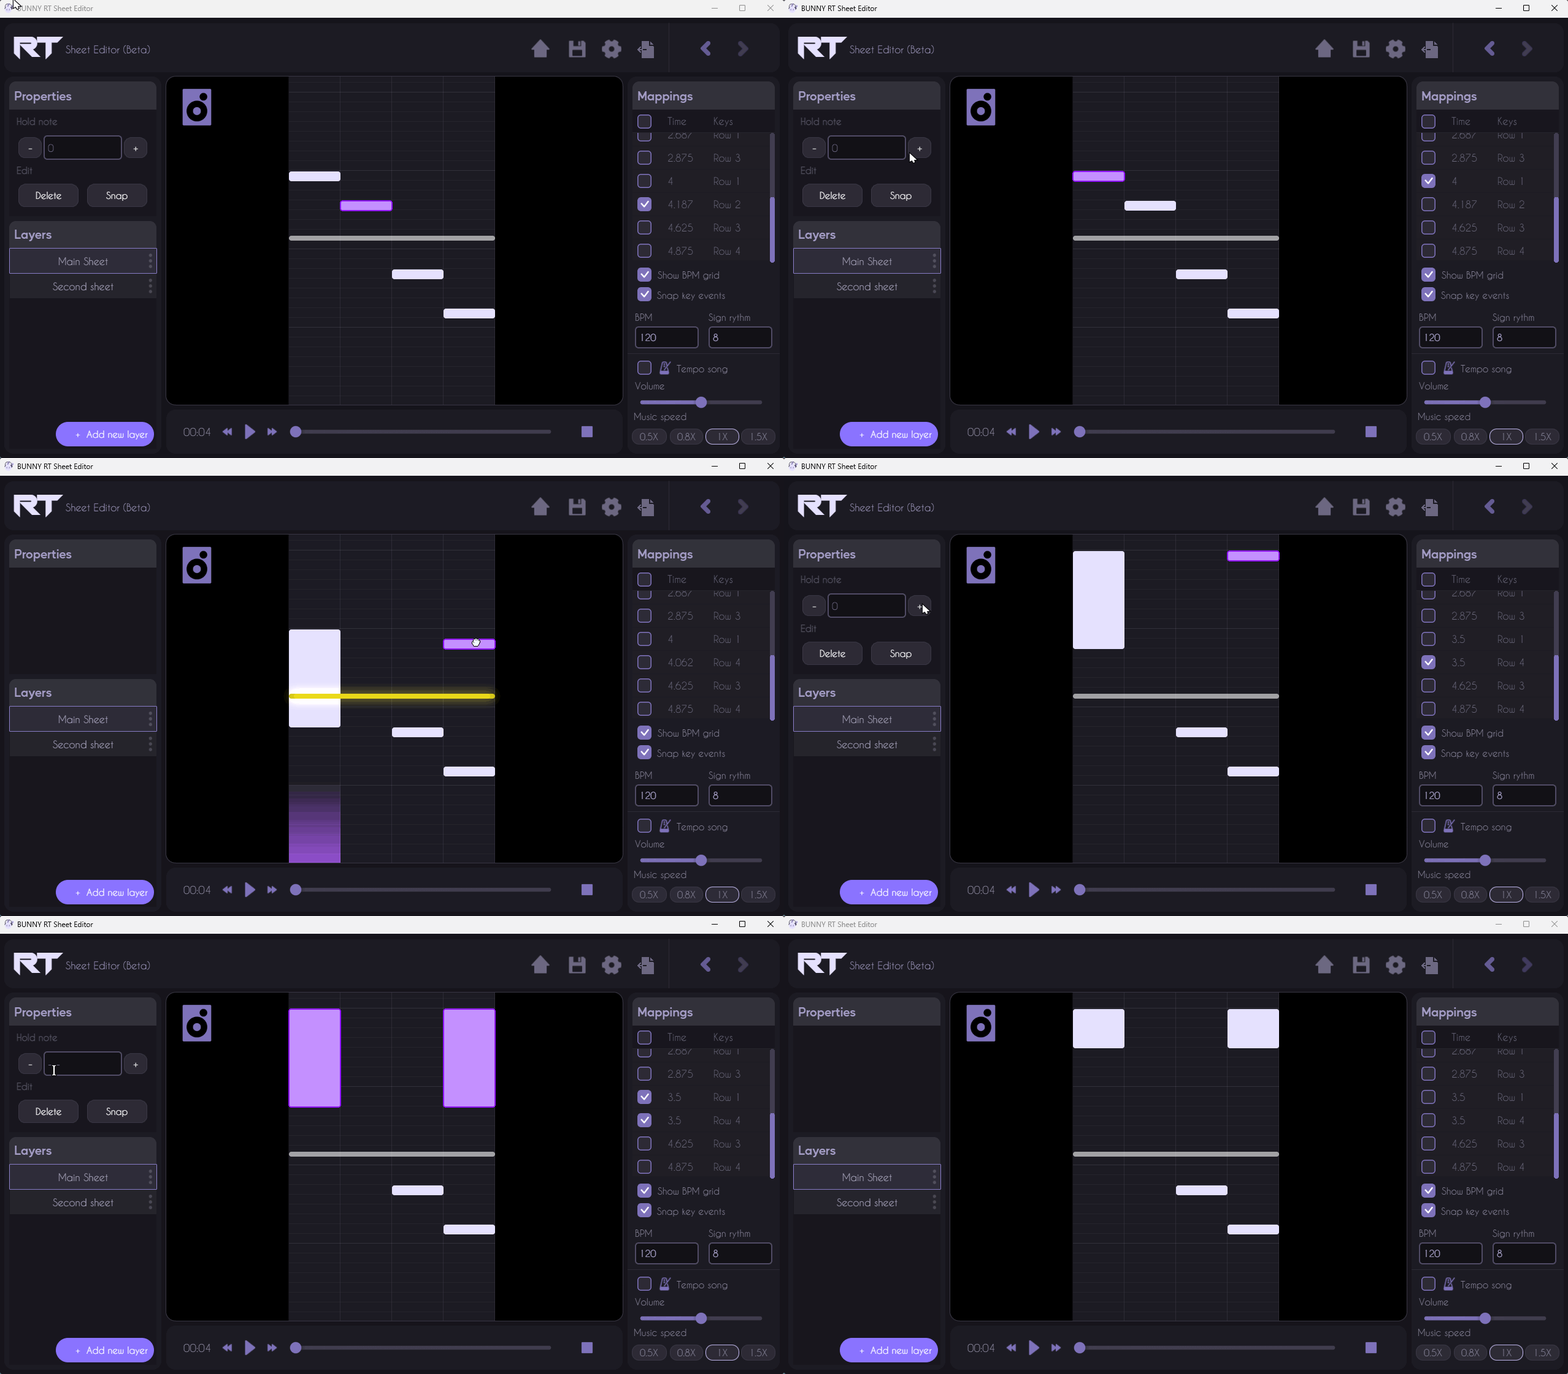
To change the duration of a note in this rhythm editor, follow these steps, as illustrated in the GIF:
1. Select the note:
Click on the note you wish to modify. The selected note will be highlighted (often with an outline or color change).
2. Access note properties:
Once the note is selected, look in the properties panel on the left-hand side of the interface.
3. Modify note duration:
In the properties panel, locate the “Hold note” option with plus (+) and minus (-) buttons. Click the plus (+) button to increase the note duration, or the minus (-) button to decrease it.
Localization
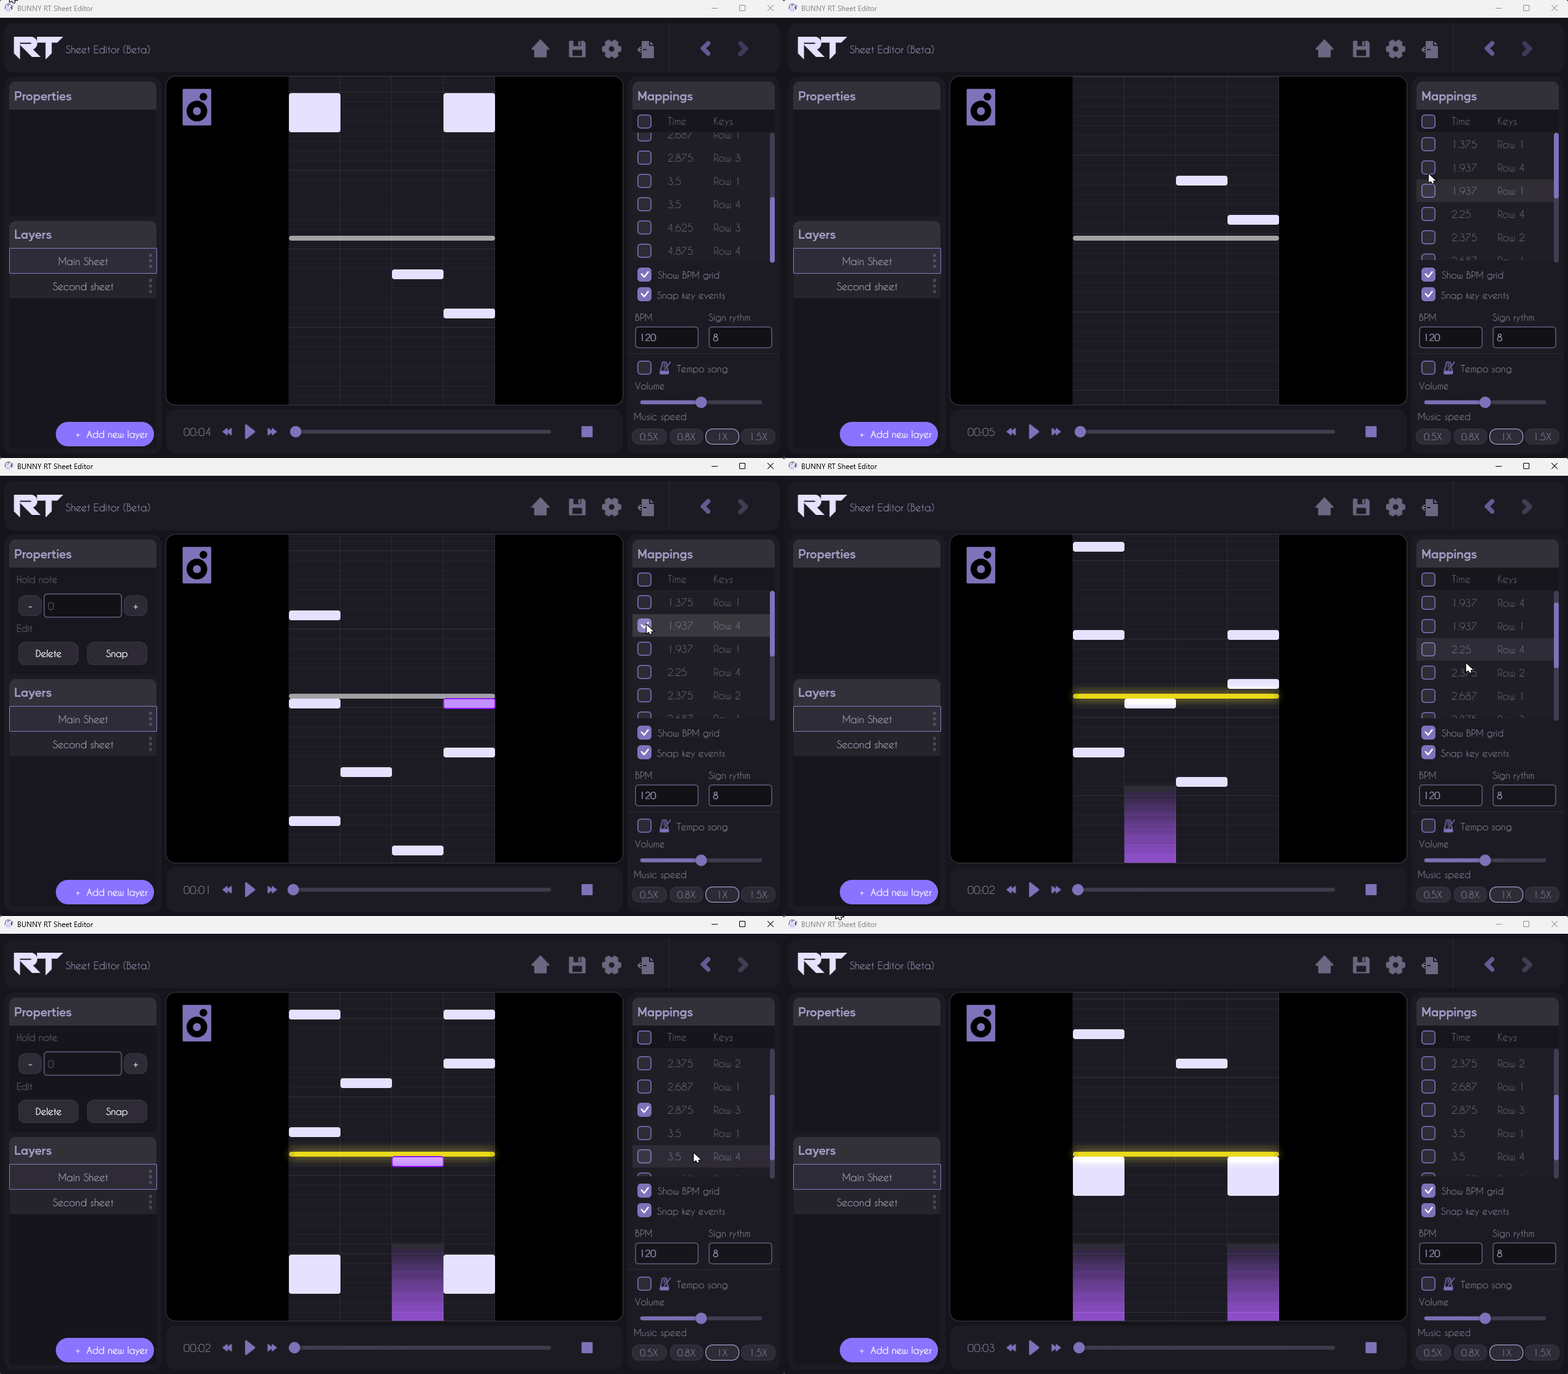
To locate a note in this rhythm editor, follow these steps, as illustrated in the GIF:
Access the list of notes:
- In the right-hand panel, you'll find the list of notes under the “Mappings” section.
Identify the note:
- Search for the note you want to locate based on its attributes such as time and row (“Row”).
Use checkboxes:
- Check the box corresponding to the note in the list. This will highlight the corresponding note on the rhythm sheet,
Double-click:
- Double-click on a line in the mapping list to locate it visually.